How to Add an Email Account to an IOS Device
The following instructions apply to iPhones and iPads including mini iPads, all versions.
Please note, there may be small differences in the wording depending on versions but overall the following should apply.
Before to start you should have the following information at hand:
- Username and password. Your username (for our clients) is your full email address
- The incoming and outgoing mail server
- The incoming and outgoing ports
If you do not have this information at hand please contact us before to start.
From the home screen, click on settings

The click on Mail, contacts, calendars

Click on add Account…

Click on Other

Click Add mail Account

Fill in your email detail and click next at the top

After searching for a few seconds you will be brought to a screen asking you for the full detail.
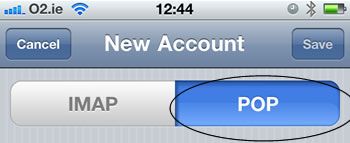
Make sure you select POP (as opposed to IMAP), then fill in your incoming and outgoing mail server detail and click save.

The phone may look for several seconds (it often takes substantially more than just a few seconds) and may end giving you a message “cannot connect using SSL, Do you want to try setting up the account without SSL?”
This means you are using the regular mail settings, either click yes to continue OR (recommended) change the settings to use the secure mail / SSL settings you have been provided with.
The phone will then come back to the original screen with your account added, you are done!
Common errors are to select IMAP as opposed to POP 3 which would prevent the phone to connect to your server.
You may also get an error when trying to send emails:
You can receive emails but are getting an error “cannot connect to the outgoing mail server” or similar
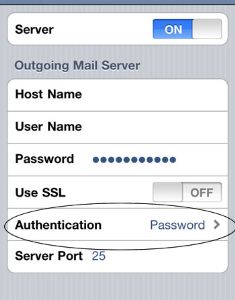
The problem is mostly like with the authentication settings.
Go to settings >> Mail, Contacts, Calendars and select the email account.
Scroll down to SMTP and click on it >> Select your primary server and review what has been selected under “Authentication”. Some servers do not require authentication. For our own customers please use “Password”.
You are done!
How to Add an Email Account to an Android Device
How to Add an Email Account to an IOS Device
How to Add an Email Account on Outlook
Adding a POP 3 account to Windows Live Mail
How to add a content filter on SmarterMail
How to get outlook to remove mail
How to send emails through your internet service provider
Setting up an email signature
Managing your spam filter on SmarterMail
Setting up an auto forwarder on SmarterMail
Setting up and manage an auto responder on SmarterMail
What is the difference between a POP3 and IMAP set up